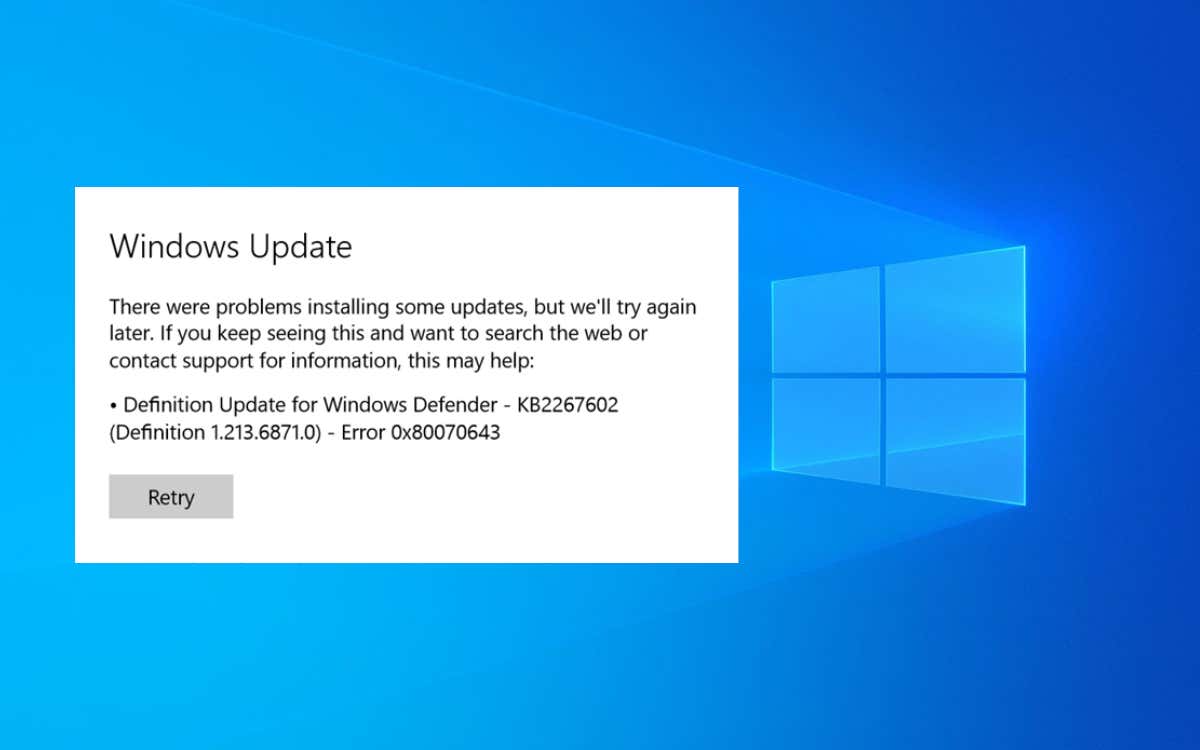
Windows Update can occasionally display error code 0x80070643 while updating system components such as Windows Defender and the Microsoft .NET Framework to their latest versions. Rarely, it could also show up while installing quality and cumulative Windows system updates. Error 0x80070643 can show up for several reasons. For example, it could be due to a buggy instance of the Windows Update service or a corrupt .NET Framework installation. Work through the following instructions to troubleshoot and fix Windows Update error code 0x80070643 in Windows 10 and 11.
1. Restart Windows Update Services
BITS (short for Background Intelligent Transfer Service), Windows Update Service, and Cryptographic Services are system-related services that Windows Update requires to function correctly. They can sometimes glitch out or crash and trigger the 0x80070643 installation error.
Rule that out by restarting all three services using the Services app. To do that:
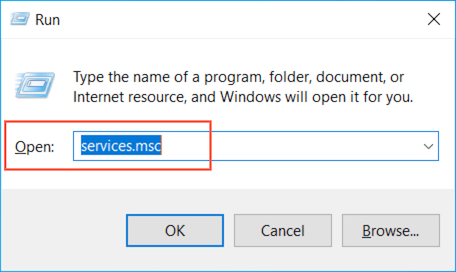
- Press Windows Key + R to open a Run box. Then, type services.msc and press Enter.
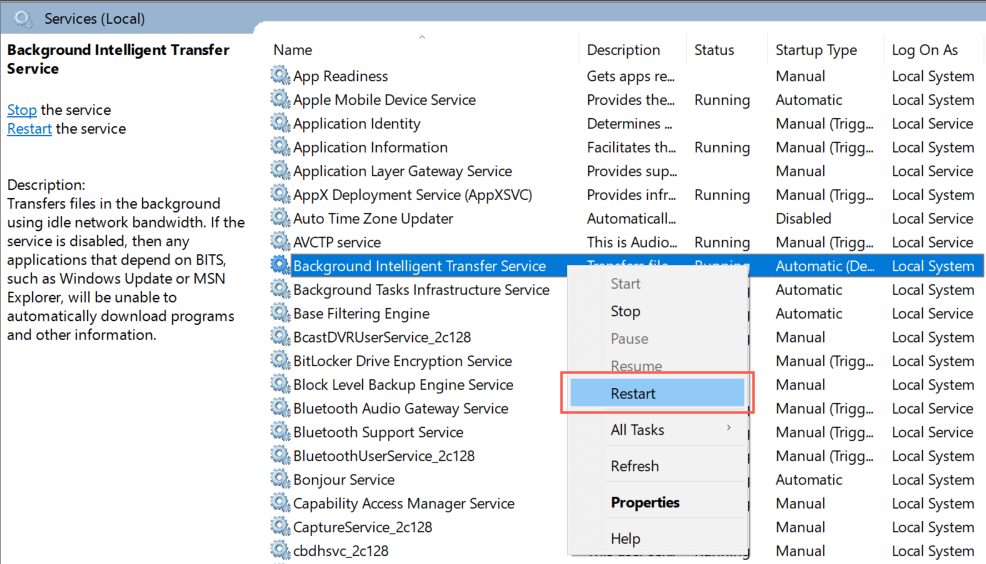
- Right-click Background Intelligent Transfer Service and select Restart. If the option appears grayed, choose Start.
- Scroll down the services list and repeat what you just did for Windows Update and Cryptographic Services.
2. Reboot PC and Retry Update
Restarting your PC is another quick way to fix Windows Update’s 0x80070643 error. If you haven’t already, open the Start menu and select Power > Restart. Then, head back to Windows Update and reinstall the update.
3. Run Windows Update Troubleshooter
Try running the built-in Windows Update troubleshooter if the 0x80070643 error continues to show up. It can identify various issues stopping Windows Update from working and offers recommendations and automatic fixes to address update-related problems. To run the Windows Update troubleshooter:
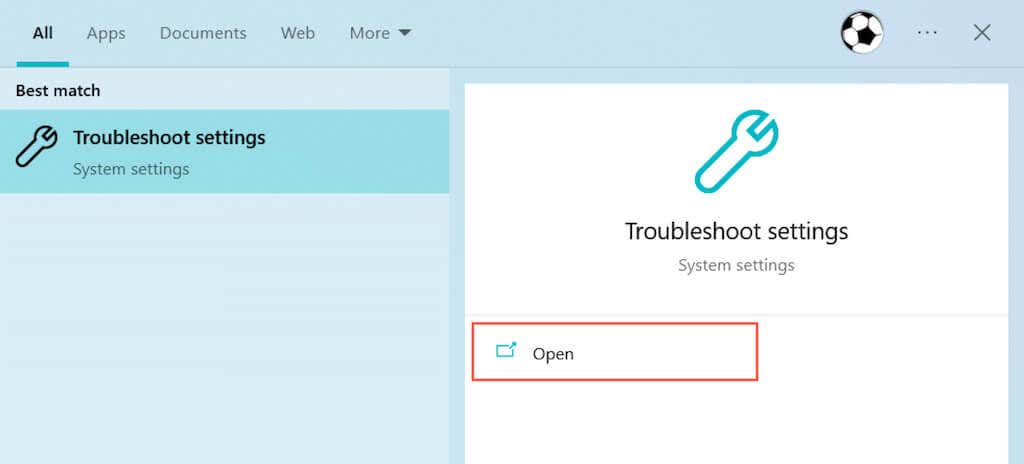
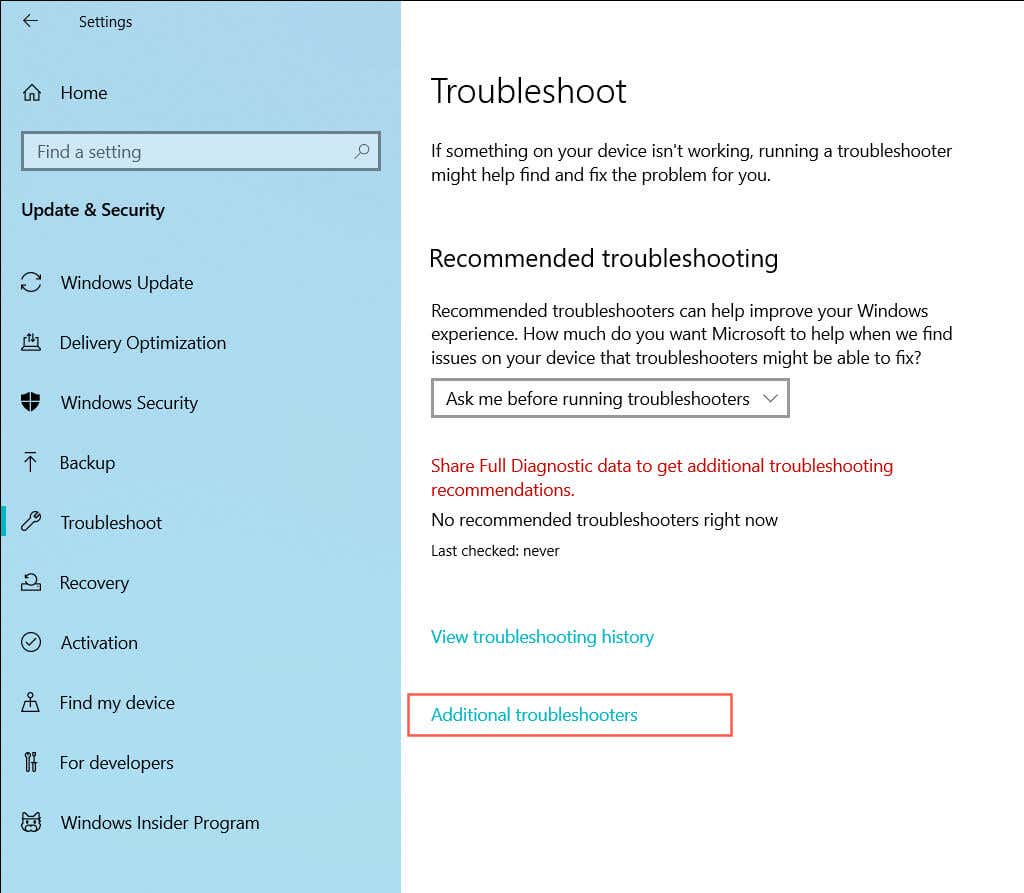
- Press Windows + S to open Windows Search. Then, type Troubleshoot Settings and select Open.
- Select Additional/Other troubleshooters.
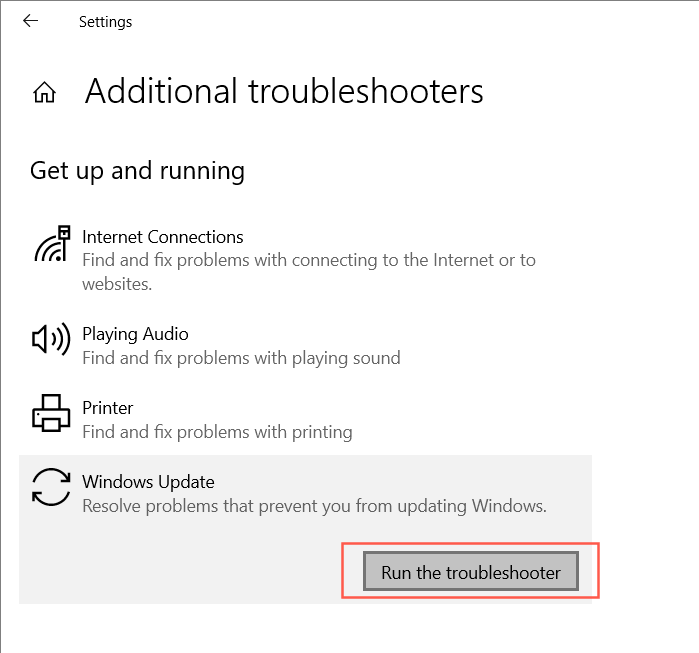
- Select Run next to Windows Update.
4. Run .NET Framework Repair Tool
Does the 0x80070643 error only show up while installing Microsoft .NET Framework updates? If so, run the Microsoft .NET Framework Repair Tool to check for corrupt files and other issues with the current .NET Framework installation.
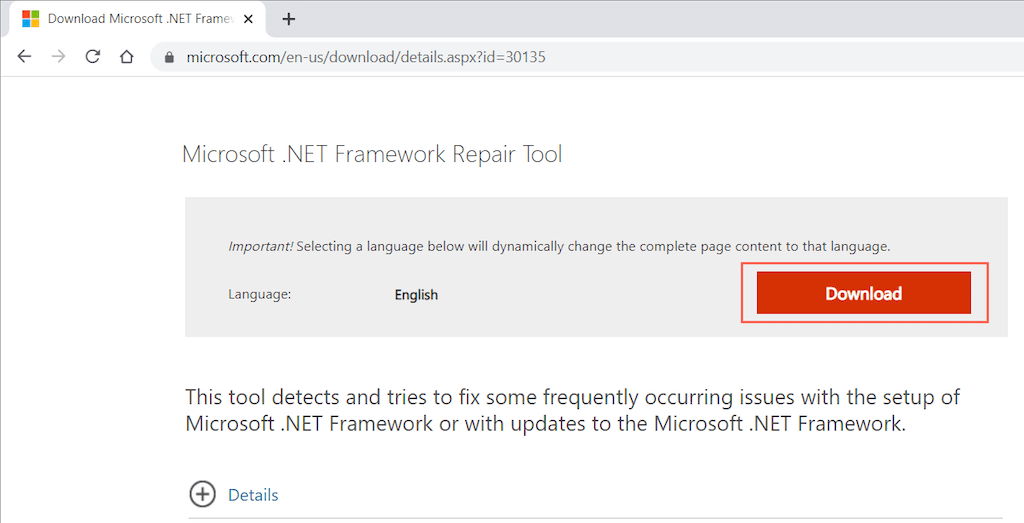
- Download the Microsoft .NET Framework Repair Tool from the Microsoft website.
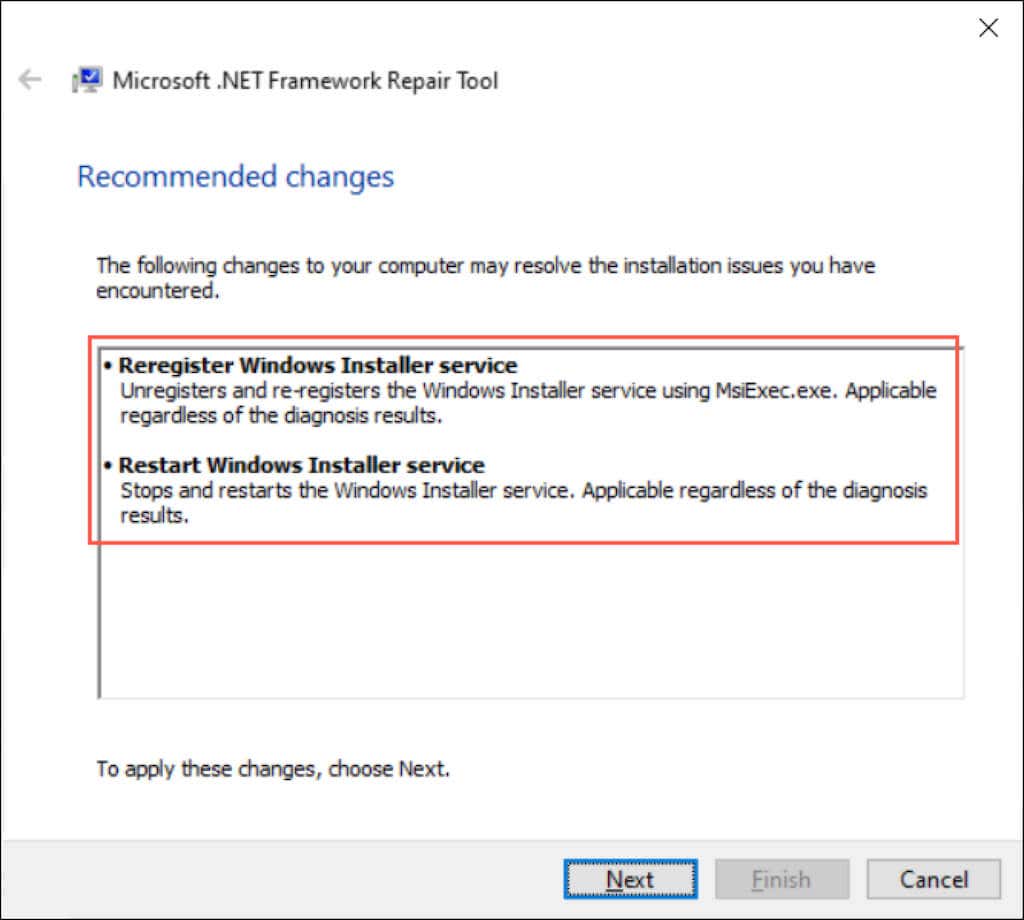
- Double-click the downloaded NetFxRepairTool.exe file and accept Microsoft’s license terms. Then, review the recommended changes and select Next to apply them. Do not exit the Microsoft .Net Framework Repair Tool yet.
- Re-open Windows Update and retry the Microsoft .NET Framework update. If the update completes successfully, select Finish to exit the Microsoft .Net Framework Repair Tool. If not, choose Next to perform additional troubleshooting.
5. Reset Windows Update
Windows Update caches various files and signatures in a couple of system folders called “SoftwareDistribution” and “catroot2.” The data inside can corrupt and trigger the 0x80070643 error.
Force Windows Update to recreate the SoftwareDistribution folder and the Catroot2 folder to eliminate potential issues with data corruption. To do that:
- Open the Start menu, type cmd, and select Run as administrator to invoke an elevated Command Prompt console.
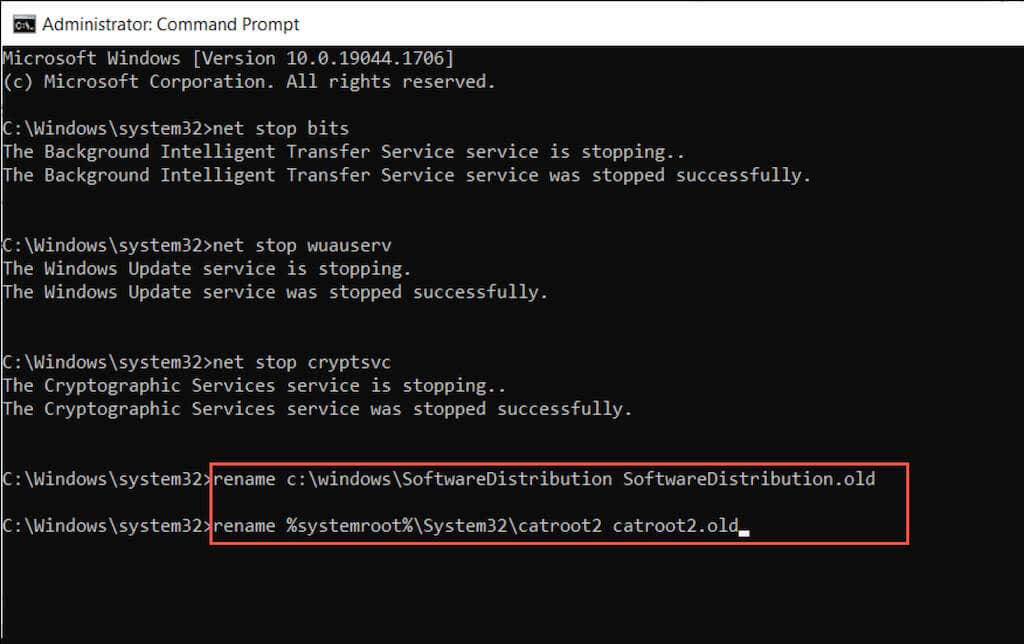
- Run the commands below one after the other to stop the Background Intelligent Service, Windows Update Service, and Cryptographic Services:
net stop wuauserv net stop cryptSvc net stop bits
- Run the following commands to rename and backup the current Software Distribution and Catroot2 folders:
rename c:\windows\SoftwareDistribution SoftwareDistribution.old rename %systemroot%\System32\catroot2 catroot2.old
- Run the commands below one after the other to restart the Background Intelligent Service, Windows Update Service, and Cryptographic Services:
net start wuauserv net start cryptSvc net start bits
- Try using Windows Update again.
6. Perform a Clean Boot
If the 0x80070643 error persists, try installing the latest updates after clean booting Windows. It’s a process that prevents third-party services and startup programs from interfering with Windows Update. To do that:
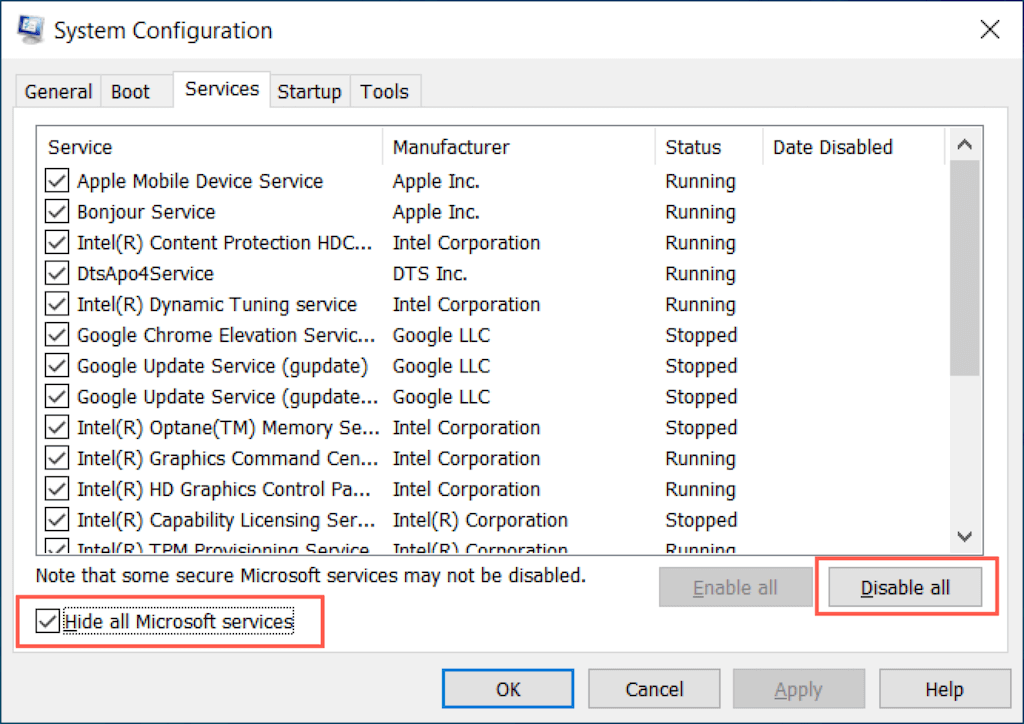
- Type msconfig into a Run box and press Enter. Then, switch to the Services tab, check the box next to Hide all Microsoft services, and select Disable all.
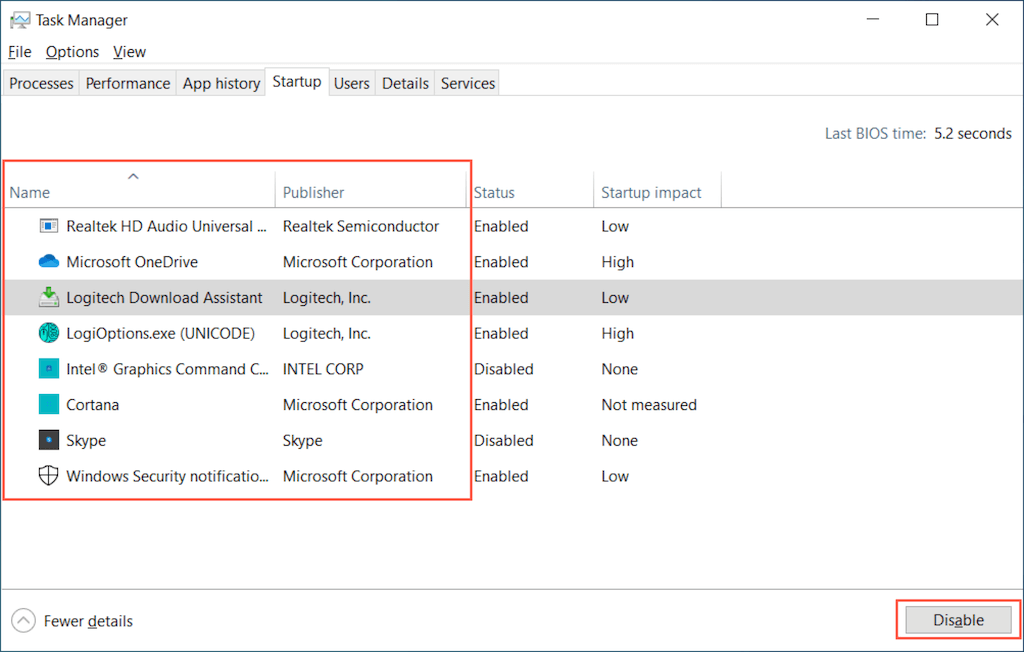
- Switch to the Startup tab and select Open Task Manager. Then, disable all non-Microsoft startup programs.
- Restart your computer and run Windows Update. If that helps, repeat steps 1-2 and re-activate all disabled items.
7. Install Updates via Microsoft Update Catalog
If a clean boot doesn’t help, try installing the problematic update via the Microsoft Update Catalog. To do that:
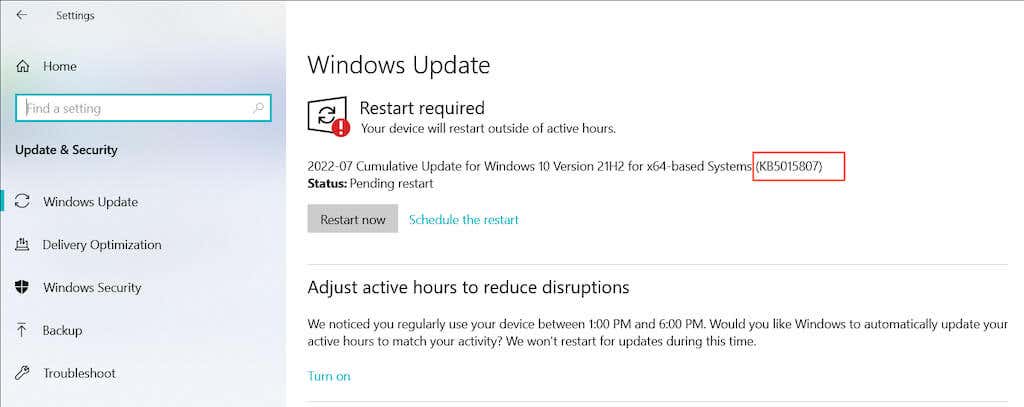
- Visit Windows Update and note the failing update’s KB (Knowledge Base) ID.
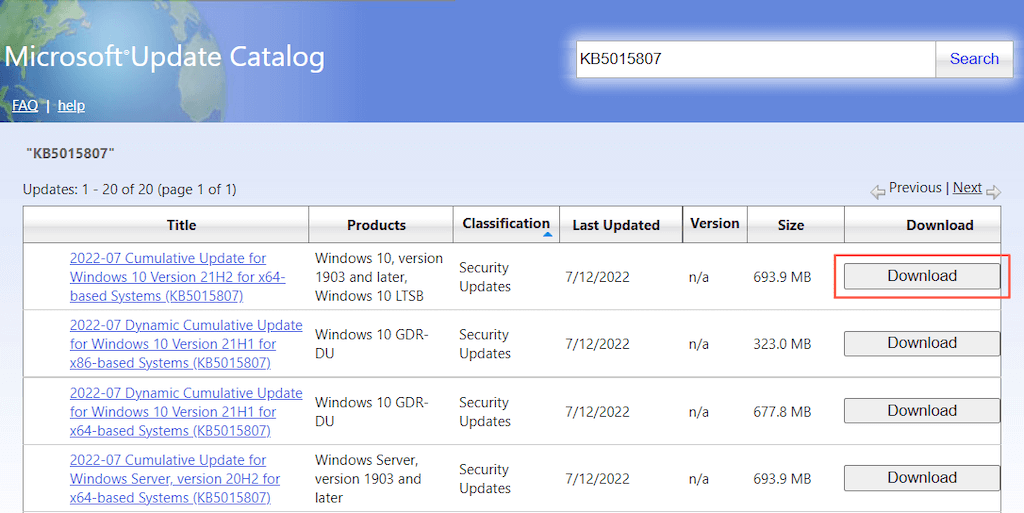
- Visit the Microsoft Update Catalog, enter the KB ID, and select Search. Then, choose and download the update file. Make sure it matches the current Windows build version and operating system architecture (x64, x86, or ARM64).
- Run the downloaded file and follow all on-screen installation instructions. Then, select Restart Now to finalize the update.
8. Manually Update Windows Defender
If the 0x80070643 error shows up for Windows Defender definitions updates only, you can download and install without using Windows Update.
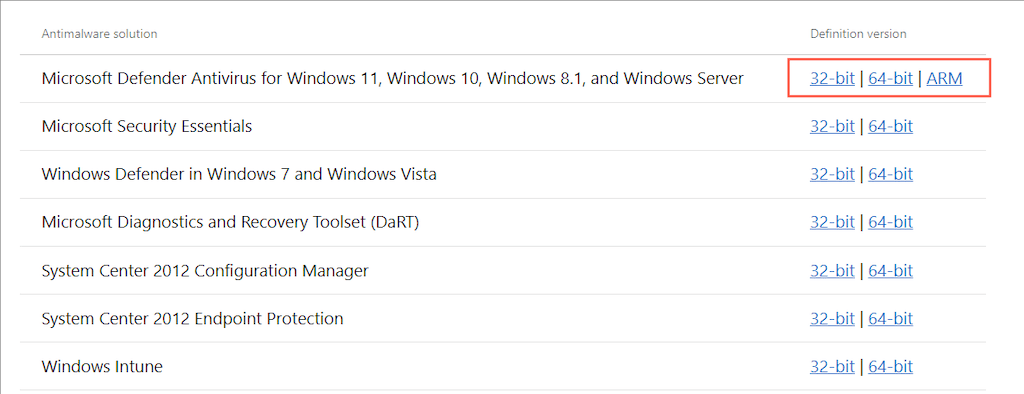
To do that, visit the Microsoft Defender Antivirus updates page and scroll down to the Latest security intelligence update section. Then, download the latest definition pack for Microsoft Defender Antivirus that matches your operating system’s architecture and run the downloaded file.
9. Run an Anti-Malware Scan
Computer viruses often infect Windows Update to stop it from installing security fixes and anti-virus definitions. If Windows Update’s error 0x80070643 error continues to show up, it’s a good idea to rule out all possibilities of a potential malware infection.
Instead of Windows Defender, using a potent third-party antivirus software solution to perform a thorough scan for viruses is the safest option. For example, the free version of Malwarebytes is an excellent choice at detecting and removing stubborn malware.
10. Run SFC Scan or DISM Tool
A corrupt Windows installation can also play a factor and result in Windows Update error 0x80070643. Running the System File Checker and the DISM tool can help fix issues with system files and improve stability. Right-click the Start button and select Windows PowerShell (Admin). Then, type sfc /scannow and press Enter to launch the System File Checker. Next, enter the following command and press Enter to invoke the DISM (Deployment Image Servicing and Management) tool. DISM.exe /Online /Cleanup-Image /Restorehealth After performing both scans, use Windows Update and check if error 0x80070643 recurs.
Error Code 0x80070643 Fixed
Error 0x80070643 is a relatively straightforward problem to fix compared to other Windows Update issues. For example, restarting Windows Update-related services, running the Windows Update troubleshooter, or clearing the Windows Update cache should always help. If not, running through the rest of the fixes definitely will. In the off-chance that none of them works, consider resetting your Windows installation to factory defaults.
