Maybe it’s vacation photos you want to send to a friend, home movies that your uncle asked for, or your music collection, 4K raw video files, backup data, video games, etc. No matter what you’re sending, there are ways to make it work. However, before choosing the best way to send the large files, first identify how big they actually are so that you’re using the most appropriate service (i.e., don’t pay for what you can get free).
Calculate the
Overall Size
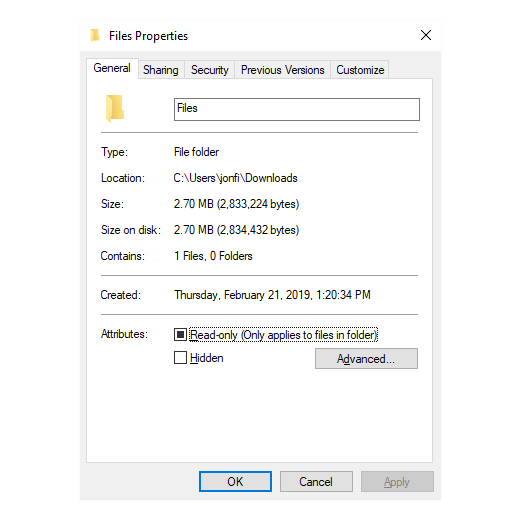
You can’t know which file sending service to use unless you understand how large your files are. For example, if you’re sending a movie to someone that’s just 800 MB, you can use a different service than if you’re trying to deliver a 1 TB collection of videos. The easiest way to see how much storage the files are taking up is to put them into a folder and then identify the size of the folder. The same can be done with individual files if that’s all you’re sending. In Windows and Linux, right-click the item and choose Properties; Mac users should right-click and select Get Info.
Choose a File
Sharing Service
There are lots of services out there that can share files with other people. One option is cloud storage, where your files are first uploaded to a remote server tied to your user account, and then from there you can share those files with anyone you want. The benefit is that you only have to upload it once, and then they’re always accessible and easy to share with as many people as you like. Temporary cloud storage is similar to regular online storage but the files aren’t kept for long periods of time and you usually don’t need to make a user account to use them. The files can often be shared multiple times with different people through a special link. Another option is to use a P2P file sharing service so that the files aren’t saved anywhere and instead transferred directly from your computer to the other person’s computer. You might prefer a P2P service because they’re more on-demand, generally have no limitations, and your files aren’t kept online. The downfall is that you have to re-upload the files in the future if you decide to share them again, plus the speed at which someone can download your files is limited by your upload connection.
Cloud
Storage
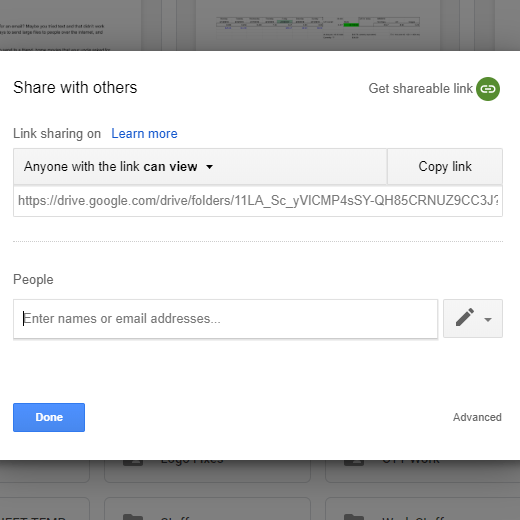
Google provides anyone with a Google account 15 GB of storage, some of which you can use in Google Drive to share files with others. Upload your files there and share whole folders or individual files with anyone, which they can download at max speeds. You can pay for more storage. MEGA is a cloud storage service with a primary focus on encryption and privacy. You’ll get 50 GB for free but can upgrade for more. Files and folders can be shared with anyone and you have the benefit of not sharing the decryption key so that only specific people with the link can actually access the files. MediaFire lets you upload files as large as 20 GB which you can use with your Basic, Pro, or Business account that comes with online storage of 50 GB, 1 TB, and 100 TB, respectively. Share files and entire folders with others, even if they’re not MediaFire users. Paid plans offer advanced link sharing like password protection and one-time use links, folder downloads, direct linking, and more.
Temporary
Cloud Storage
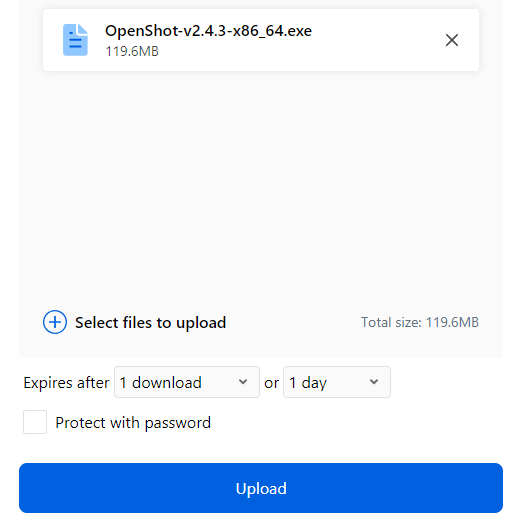
Firefox Send lets you upload up to 2 GB of data (or 2.5 GB if you log in) at a time that can expire after anywhere from one to 100 downloads, or after five minutes, one hour, one day, or one week. You can also password protect the download. Use WeTransfer to send up to 2 GB of files at a time that you can share by email or a special URL. Files are deleted automatically after one week unless you get WeTransfer Plus, which is more of a permanent cloud storage service where you can store up to 500 GB of data, password protect file shares, and more. The free version of WeSendit.com supports sending large files up to 5 GB to up to 15 recipients simultaneously, and maxes out at 500 files per upload. Send the downloads by email or a link; they expire in seven days. Pay for premium and the transfer limit jumps to 20 GB with extra features like password protection, 100 GB of online storage, unlimited storage time, and more.
P2P
File Sharing
ShareDrop is a blank page where you and other people can join a special link and share files amongst each other. There are no file size limits or any customizations at all. Just choose someone else in the virtual room to send the file to, pick the file from your computer, and have the person confirm to accept and start the P2P file transfer. The JustBeamIt free file transfer website lets you move files over the internet no matter their size. You’re given a one-use link which anyone who uses can download the files you’ve prepared, but they’ve only got 10 minutes to start the download or the files expire. Use Takeafile’s Live Transfer feature to send any file up to 500 GB directly to the other person (no server upload). Or, use the Cloud Upload option as a temporary cloud storage service so that the recipient can download your files faster; it’s limited to 512 MB per file and doesn’t accept every file format.
Consider
Compression
Whether you’re sending files over email, uploading them to a cloud storage service, or sharing them over a P2P file transfer service, compression can help a lot. For example, if your email service won’t accept a few files because they’re a few megabytes over the limit, compressing them in an archive might help by reducing the overall size they’ll take up during transmission. Compression is also handy if you have several files you want to share at once but the file transfer service you’re using can accept only single-file uploads. Put all the files into an archive and then upload that single file, which the recipient can then download and unpack to see all the files you’ve shared. 7-Zip is one of the most popular compression programs, but some other options include WinZip, PeaZip, and the compression features built-in to your operating system. You can learn the differences between some of these compression tools if you’re not sure which one to use.
File Transfer
Example
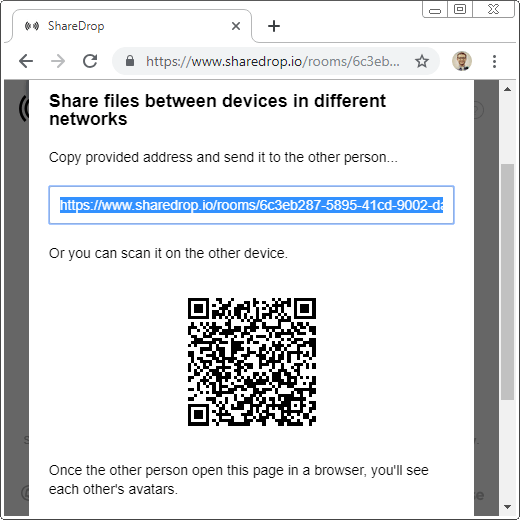
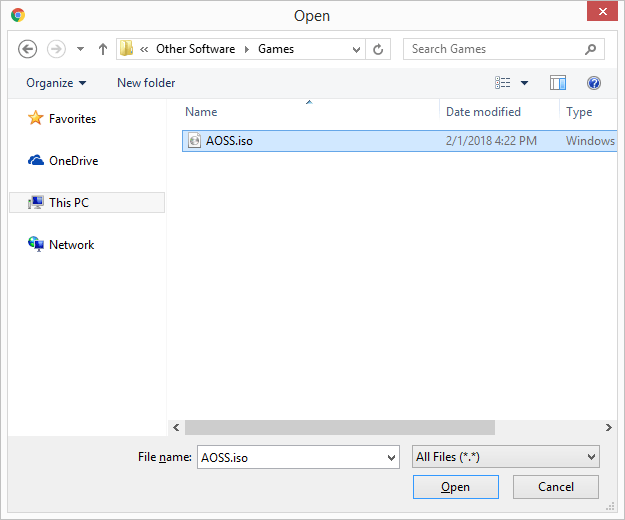
Now that you have a good idea of how to determine which transfer service you might need and what your options are for sending large files online, follow along with this example of ShareDrop to see how it looks in action: Step 1: Open the ShareDrop website. Step 2: Press the plus sign at the top right. Note: If you’re transferring the large files to other people on your same network — those that share the same public IP address as you —skip down to Step 5; ShareDrop will automatically identify other local users. Step 3: Copy the link you see in the text box and share it with the person you’re sending the file to. Step 4: Press Got it! on your page. At this point, you should see all the other people who have opened the link you shared. Step 5: Select the avatar for the person you want to send the file to. Everyone is self-identified at the bottom of their own page. Step 6: Choose the file from your computer that you want to send. Step 7: Press Send on the ShareDrop page, and then instruct the recipient to press Save on their page. That’s it! Now, you can watch the blue progress bar around the recipient’s avatar to check how long it will take to complete the P2P transfer. A green checkmark will briefly show when the file transfer finishes.

![]()


